LED Ski Slope Lighting
- High-output LED fixtures designed for mountain and cold-weather conditions
- Multiple beam angles available for slopes, parks, and base areas
- DLC-listed options may qualify for utility rebates where available


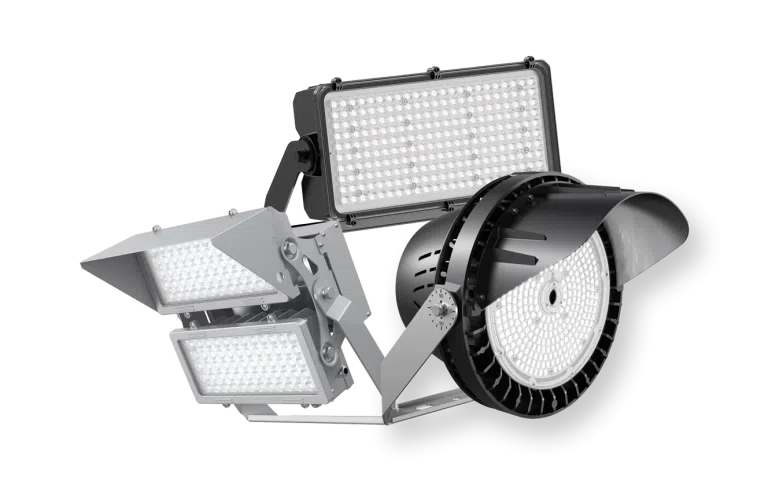
Our Ski Mountain Lights include high-output industrial LED flood lights with multiple beam angles for ski resort lighting projects. Available models vary by wattage, lumen output, voltage, optics, dimming, controls, and mounting method.
These fixtures are used for night skiing trails, beginner slopes, advanced runs, terrain parks, lift loading areas, base areas, lodge areas, parking lots, grooming zones, and resort support spaces.
-
 Starting At $697.50




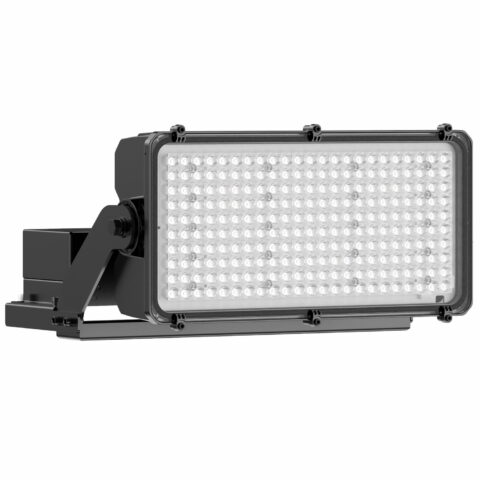


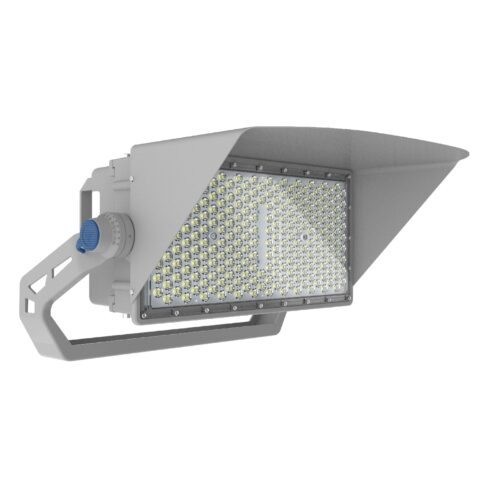
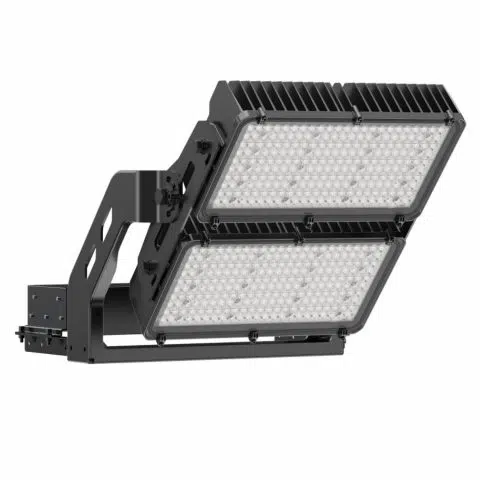
LED Ski Mountain Lighting for Slopes, Trails, Terrain Parks, and Base Areas
LED ski mountain lighting is used for night skiing trails, beginner slopes, advanced runs, terrain parks, lift loading areas, base areas, lodge areas, parking lots, grooming zones, and resort support spaces. These applications often use high-output industrial LED flood lights selected for mountain conditions, snow reflection, wind exposure, ice, cold temperatures, long throws, and difficult maintenance access.
Ski mountain lighting is different from standard parking lot or sports field lighting. Fixture selection depends on slope grade, trail width, pole height, pole location, beam angle, snow reflectance, skier speed, terrain changes, lift locations, grooming access, electrical service, and local requirements. The goal is to provide usable visibility down the fall line without creating harsh glare, dark zones, or spill light into nearby areas.
Tussey Mountain Floodlight and Wood Pole Upgrade Case Study
The Backstory of Our Relationship with Tussey Mountain
Night skiing only works if riders can see the slope in front of them. At Tussey Mountain in Boalsburg, Pennsylvania, one of the resort's busier intermediate runs sat in near darkness. The rest of the mountain ran on aging 1000-watt metal halide fixtures mounted to a pole line the resort had flagged for replacement.
The Mountain Manager, Ty Carts, placed a test order for one 400-watt LED flood light to see how it held up on one section of slope. A few weeks later, he reported back that the light was working well. He asked to see a plan and cost estimate for a bigger project.
The Challenge of Upgrading the Ski Slope Lighting
Tussey Mountain was managing two lighting problems at once. Each concern carried different risks.
A Blue Line Slope Running in the Dark
The Blue Line runs operated without any lighting for night riding. It's a popular slope that puts a mix of skill levels on the same terrain at speed with limited visual reference. Terrain changes, ice patches, moguls, boundary signage, and other riders get harder to read after dark.
Uneven Light Levels Across the Mountain
Mixing existing metal halide fixtures with new LED fixtures creates uneven light levels. A rider moving from a bright LED section into a dimmer metal halide section has to wait for their eyes to adjust.
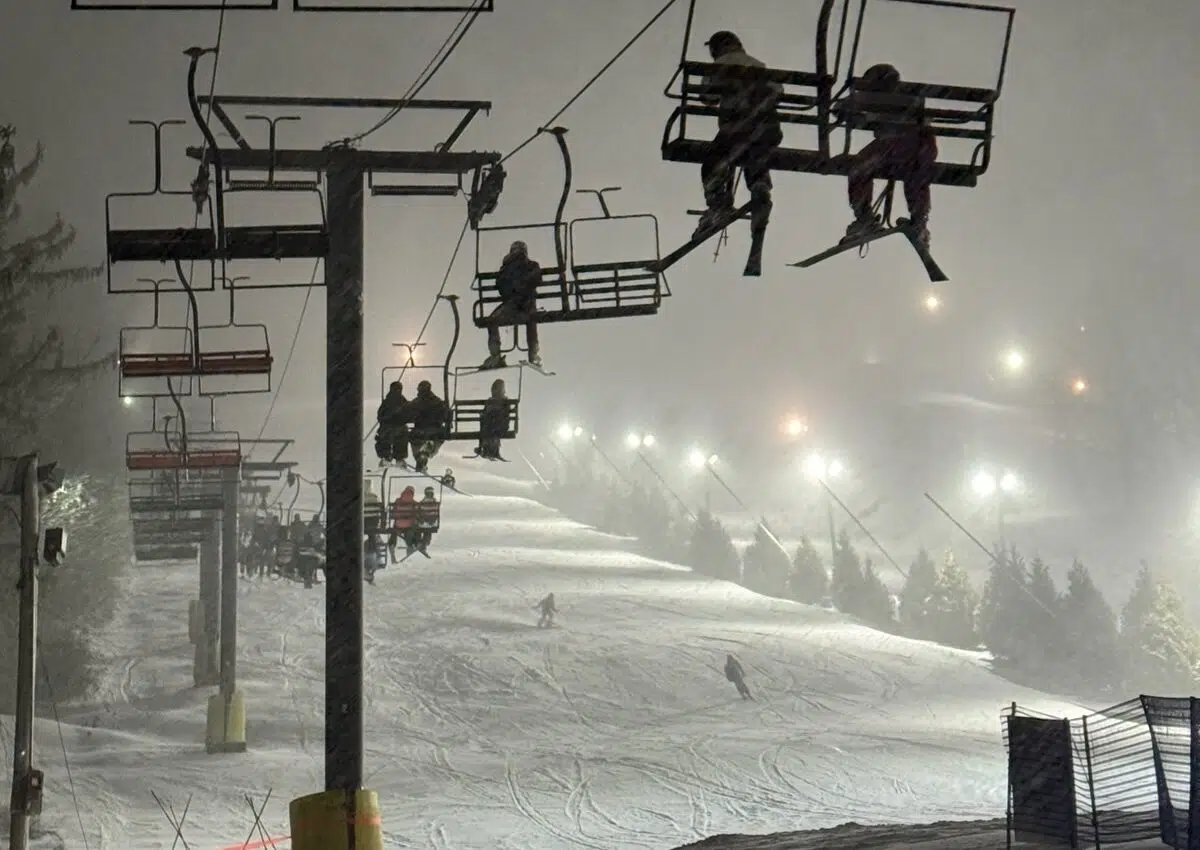
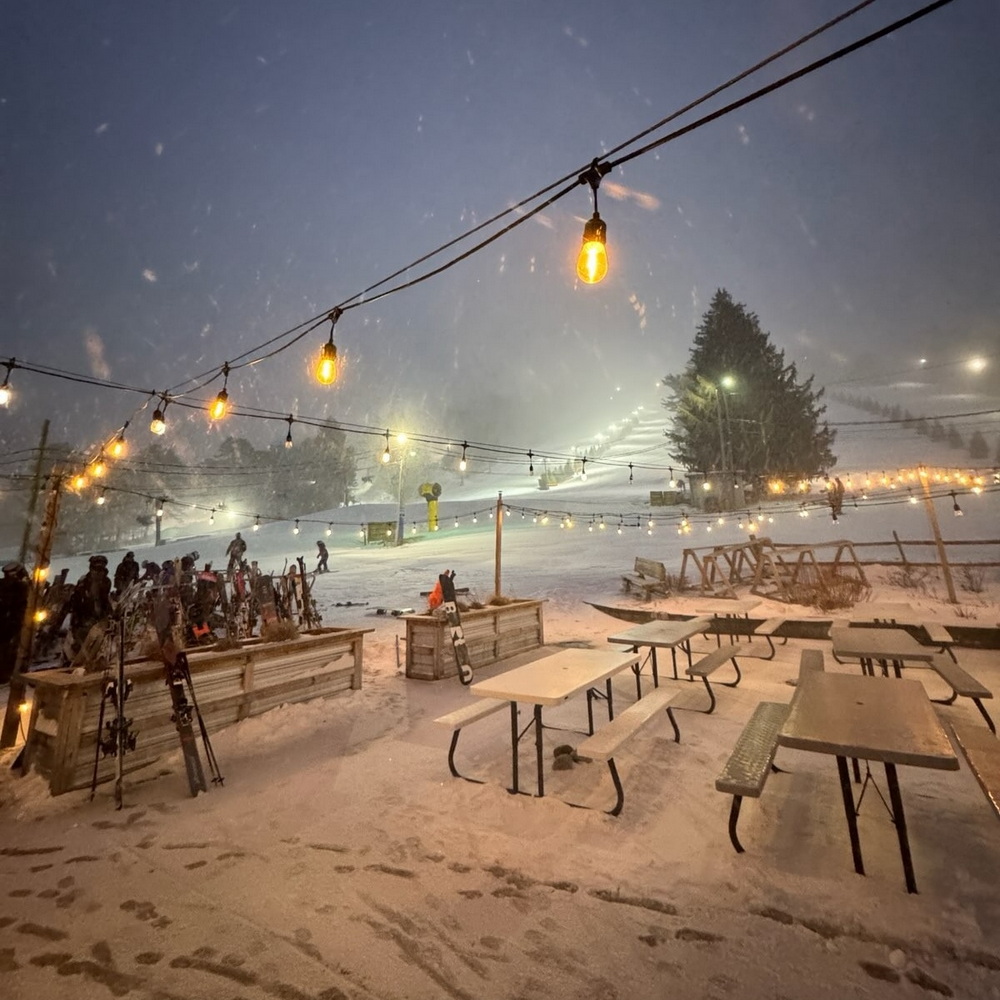
Tussey Mountain Blue Line Slope Illuminated With Our Lights and Poles During Night Skiing Operations
Lighting Plan Created for Tussey Mountain Blue Line Slopes
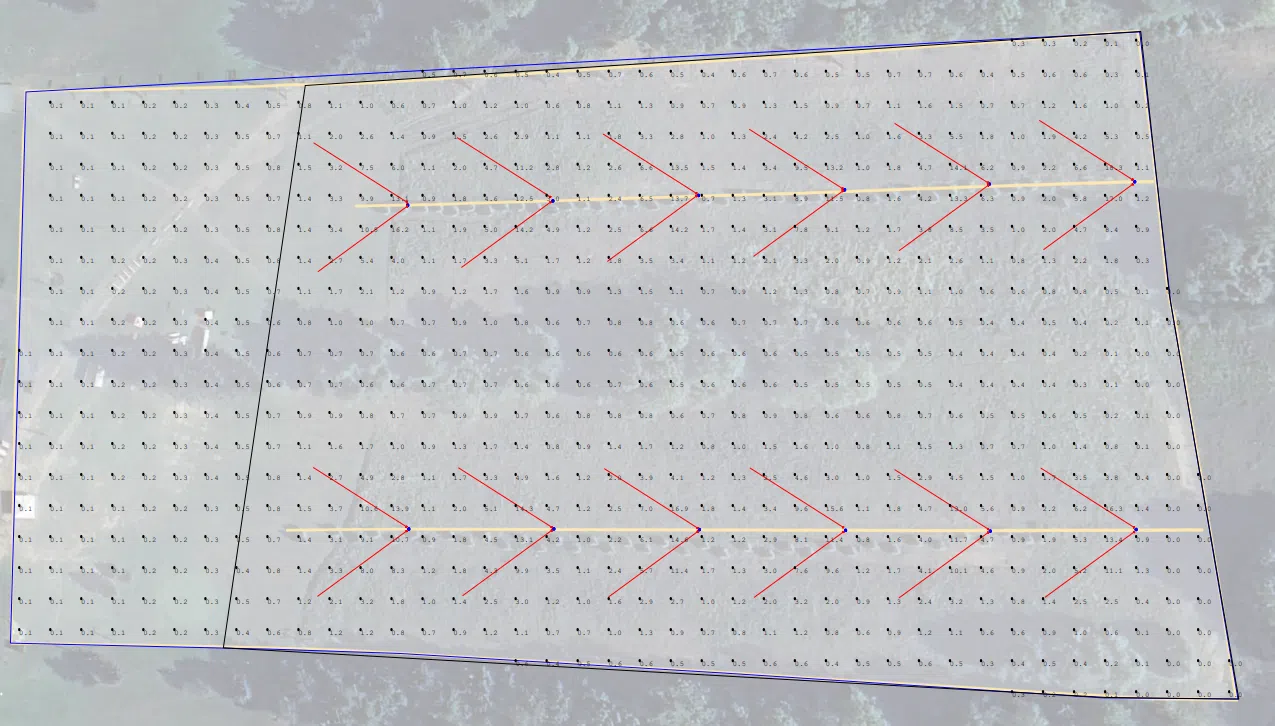
Lighting Plan Metrics
- Mounting Height: 25 ft (feet)
- Average Foot Candles (fc): 2 fc
- Product(s) Used: MLLG-POLE-WD-30-C3-T-SYP MLLG-AG-LED-IMF-400-5-[Optic]-TR-[V] MLLG-AG-LED-IMF-600-5-[Optic]-TR-[V]
Selection and Installation Note: Product specifications, wattage, lumen output, optics, beam angle, color temperature, voltage, dimming, controls, mounting method, pole compatibility, wind exposure, operating temperature, certifications, environmental rating, surge protection, and warranty coverage vary by model. Confirm the selected product specification before ordering. For ski slopes, terrain parks, lift areas, elevated poles, wooden poles, mountain electrical systems, cold-weather applications, or safety-sensitive recreational lighting, verify requirements with the resort team, project specifier, pole or structural engineer where needed, local inspector, utility provider, or a licensed electrical professional.
How to Choose LED Ski Mountain Lights
Start with the area being lit: a base area, beginner slope, steep advanced trail, terrain park, lift loading zone, and parking lot will not use the same lighting strategy. Then confirm the trail layout and skier sightlines, existing or planned pole height and spacing, beam angle and throw distance, and the cold-weather, wind, electrical, controls, and maintenance conditions that affect the selected fixture and installation.
| Selection Factor | What to Confirm |
|---|---|
| Slope type and terrain | Confirm whether the area is a beginner hill, recreational trail, advanced run, terrain park, competition area, base area, lift zone, or grooming route. |
| Trail width and fall line | Review where skiers travel, where the light must reach, and whether terrain drops, curves, moguls, or jumps create shadows. |
| Pole height and pole spacing | Confirm existing pole height, spacing, pole condition, wind exposure, EPA, mounting hardware, and whether the pole can support the selected fixture. |
| Beam angle and throw distance | Narrower optics may help project light farther down steep or advanced terrain. Wider optics may fit base areas, beginner hills, lift lines, and gathering spaces. |
| Glare and skier sightlines | Review skier approach direction, downhill sightlines, lift areas, grooming routes, and neighboring trails. More light output does not solve glare caused by poor aiming. |
| Snow reflectance | Snow can reflect light differently than pavement or turf. Review glare, contrast, shadowing, and the visibility of terrain changes under winter conditions. |
| Cold-weather operation | Confirm fixture operating temperature, driver rating, starting behavior, cable/conduit suitability, and whether the selected model is rated for the resort’s winter conditions. |
| Wind, ice, and snow exposure | Confirm wind loading, fixture orientation, mounting brackets, snow accumulation risk, ice buildup, and whether the installation needs additional structural review. |
| Controls and operating zones | Night skiing areas, terrain parks, lifts, and base areas may need separate switching or control zones. Confirm controls by trail, area, or operating schedule. |
| Maintenance access | Review how fixtures will be serviced in winter, whether lifts or grooming equipment can reach them, and whether pole locations remain accessible during snow season. |
Recommended Foot-Candles for Ski Mountain Lighting
Ski mountain light levels vary by terrain, slope difficulty, skier speed, lift activity, snow reflectance, pole spacing, fixture aiming, and local requirements. The ranges below are general planning values for common ski resort areas. Final fixture selection should account for uniformity, glare, shadows, snow conditions, maintenance access, and the selected product specifications.
Ski Mountain Lighting by Area
Each ski resort area has a different visual task. Trail lighting needs to show the fall line and terrain. Lift areas need to show queues and loading zones. Terrain parks need to show jumps, rails, landings, and approaches.
| Ski Area | Lighting Priorities |
|---|---|
| Base and lodge areas | Support skier circulation, stairs, gathering zones, rental areas, loading/unloading, signage, and transitions from buildings to snow. |
| Beginner and learning slopes | Provide comfortable, even lighting for lessons, slower movement, lift access, and high pedestrian activity. |
| Recreational night skiing trails | Support consistent visibility down the fall line, around curves, and across grade changes without harsh shadows or glare. |
| Advanced and competition terrain | Use higher output, controlled beam angles, and careful aiming for speed, steep grade, terrain variation, and viewing requirements. |
| Terrain parks | Review jumps, rails, landings, approach paths, transitions, shadows, and rider sightlines before choosing fixture locations. |
| Lift loading and unloading areas | Provide visibility for queues, lift attendants, loading zones, unloading zones, signage, and emergency stop areas. |
| Grooming and maintenance areas | Support snowcats, service roads, equipment movement, after-hours maintenance, and fixture access. |
| Parking lots and resort roads | Review vehicle movement, pedestrians carrying equipment, snow removal, plow routes, shuttle areas, glare, and light trespass when selecting LED parking lot lights. |
Wattage and Beam Angle Guidance for Ski Slopes
Fixture wattage and beam angle should be selected together. A high-wattage fixture with the wrong optic can create glare, hot spots, or dark areas. Ski slopes often need a mix of beam angles because base areas, beginner hills, steep trails, and terrain parks all distribute light differently.
| Terrain / Mounting Condition | General Guidance |
|---|---|
| Base areas and beginner hills | Medium or wider flood optics may work well where the target area is closer to the pole and the goal is broad, comfortable coverage. |
| Longer trails and steeper terrain | Narrower or medium optics, including appropriately selected long-throw LED flood lights, may be needed to project light farther down the fall line and reduce wasted light near the pole. |
| Terrain parks | Fixture placement should account for jumps, rails, landings, and shadows. Lighting should be reviewed from the rider’s approach direction. |
| Existing poles | Confirm pole condition, mounting height, wind loading, fixture weight, EPA, bracket compatibility, and electrical service before selecting fixtures. |
| New poles | Coordinate light poles for flood lights, pole height, pole location, beam angle, electrical routing, maintenance access, and terrain with the project team. |
Mountain Installation and Seasonal Considerations
Mountain lighting installations should account for wind at elevation, snow loading, ice buildup, freezing temperatures, electrical routing, maintenance access, and pole engineering. Existing poles should be reviewed before adding new fixtures, especially if the replacement fixture has a different weight, wind profile, bracket, or aiming position. For exposed installations, evaluate whether high-wind-rated light poles are appropriate for the project’s engineering requirements.
Fixture aiming should also account for snow accumulation and glare. Fixture location, aiming, shielding where available, and clear maintenance access can help direct light toward the slope and limit unwanted spill light. Confirm the final aiming approach using the selected fixture’s photometric data, terrain layout, and mounting location.
Benefits of LED Ski Mountain Lighting
- Improved night skiing visibility: Properly selected LED fixtures can support visibility across trails, lift areas, base areas, terrain parks, and maintenance zones.
- Better optical control: Multiple beam angles and aiming options can help direct light down the slope and reduce wasted light.
- Energy efficiency: LED fixtures can reduce energy use compared with older HID systems, with actual savings depending on fixture wattage, operating hours, controls, and existing conditions.
- Quick start: LED fixtures typically reach operating output without the restrike delay associated with metal halide systems; performance depends on the selected fixture and controls.
- Reduced routine lamp maintenance: LED fixtures do not use HID lamps or ballasts, potentially reducing lamp and ballast replacement associated with older HID systems.
- Cold-weather fixture options: Some models are available with extended operating temperature ranges for winter environments. Confirm temperature ratings on the selected specification.
- Controls by area: Resorts may be able to control base areas, lifts, beginner slopes, terrain parks, or individual trails separately depending on the electrical and controls layout.
Common Ski Mountain Lighting Project Mistakes
- Approving a layout without reviewing photometrics: Fixture count, output, optics, mounting height, and aiming should be evaluated with fixture-specific IES data rather than assumed from wattage or lumen output alone.
- Reviewing the slope only from a map or daytime walk-through: Nighttime field review or a lighting mock-up can reveal glare, shadows, contrast issues, and obstructions that are not apparent during daylight.
- Failing to coordinate lighting with lift and snowmaking operations: Pole locations, electrical routing, aiming, and service access should not interfere with lift clearances, snowmaking infrastructure, grooming routes, or snow-removal operations.
- Using a replacement fixture without checking the complete pole loading: A fixture change can alter EPA, weight, bracket geometry, and wind loading. Pole and mounting suitability should be confirmed using applicable manufacturer and engineering information.
- Leaving final aiming to guesswork: Installation crews should use the approved aiming schedule or photometric layout and verify aiming after installation, particularly at trail transitions, lift areas, and terrain features.
- Not planning for snow-season servicing: Identify access equipment, service routes, lockout procedures, spare-fixture strategy, and the practical ability to reach fixtures when snow depth and operating conditions are at their peak.
- Combining unrelated areas on one control schedule: Separate control zones can help avoid operating all trail, base, lift, and maintenance lighting when only certain areas are in use.
- Ignoring spill-light impacts beyond the ski area: Review property boundaries, adjacent trails, roadways, lodging, wildlife considerations, and local lighting requirements as part of the final layout.
Ski Mountain Lighting Certifications, Rebates, and Warranty Support
Selected LED ski mountain lights from LED Lighting Supply may carry a safety listing or certification such as UL, ETL, or CSA, depending on product. Some models may be DLC or DLC Premium listed for utility rebate programs where available. DLC qualification is an efficiency and performance designation, not an electrical safety certification. Rebate requirements vary by utility, region, project, and product listing, so confirm eligibility on the selected product specification before ordering.
Warranty coverage varies by product, with many models offering a 5-year warranty. Before purchase, confirm the exact warranty, certifications, DLC status, voltage, controls compatibility, mounting method, wet-location or environmental rating, surge protection, and whether the fixture is appropriate for the site layout and surrounding conditions.
LED Ski Slope Lighting FAQs
How Should I Choose LED Ski Mountain Lights For Different Areas?
Select LED ski mountain lighting around the terrain and visual task, because base areas, beginner slopes, advanced trails, terrain parks, lift zones, and grooming routes do not use the same lighting strategy. Confirm the slope type, trail width, fall line, terrain changes, pole conditions, skier sightlines, maintenance access, electrical service, and local requirements.
How Do Beam Angles Affect Ski Slope Lighting Selection?
Beam angle should be selected with fixture wattage and the specific terrain being illuminated. Narrower optics may help project light farther down steep or advanced terrain, while wider optics may fit base areas, beginner hills, lift lines, and gathering spaces.
What Should Be Reviewed Before Using Existing Ski Slope Poles?
Review existing pole height, spacing, condition, wind exposure, wind loading, fixture weight, EPA, mounting hardware, bracket compatibility, and electrical service before selecting fixtures. Existing poles should also be reviewed when a replacement fixture has a different weight, wind profile, bracket, or aiming position.
How Can A Ski Resort Reduce Glare On Slopes And Trails?
Reducing glare requires reviewing skier approach direction, downhill sightlines, lift areas, grooming routes, neighboring trails, fixture aiming, snow accumulation, and fixture location. More light output does not solve glare caused by poor aiming.
What Should Be Considered When Lighting A Terrain Park?
Terrain park lighting should account for jumps, rails, landings, approach paths, transitions, shadows, and rider sightlines before fixture locations are chosen. Lighting should be reviewed from the rider's approach direction.
What Cold-Weather And Mountain Conditions Should Be Confirmed?
Confirm fixture operating temperature, driver rating, starting behavior, cable or conduit suitability, wind loading, mounting brackets, snow accumulation risk, ice buildup, and structural requirements for the selected installation. Some models are available with extended operating temperature ranges for winter environments, so confirm temperature ratings on the selected specification.
Can Ski Resort Areas Be Controlled Separately?
Night skiing areas, terrain parks, lifts, and base areas may need separate switching or control zones. Resorts may be able to control base areas, lifts, beginner slopes, terrain parks, or individual trails separately depending on the electrical and controls layout.
What Certifications And Warranty Coverage Are Available For LED Ski Mountain Lights?
LED ski mountain lights from LED Lighting Supply carry a safety listing such as UL, ETL, or CSA, depending on product, and many models are DLC or DLC Premium listed for utility rebate support where available. Most LED ski mountain lights include a 5-year warranty unless otherwise specified, and rebate eligibility, certifications, DLC status, voltage, controls compatibility, mounting method, and environmental rating should be confirmed on the selected product specification before ordering.