Metal Halide to LED Conversion Kits
- Upgrades existing HID fixtures without full fixture replacement
- Instant-on operation eliminates metal halide warm-up time
- Product specialists help match kits to existing fixtures


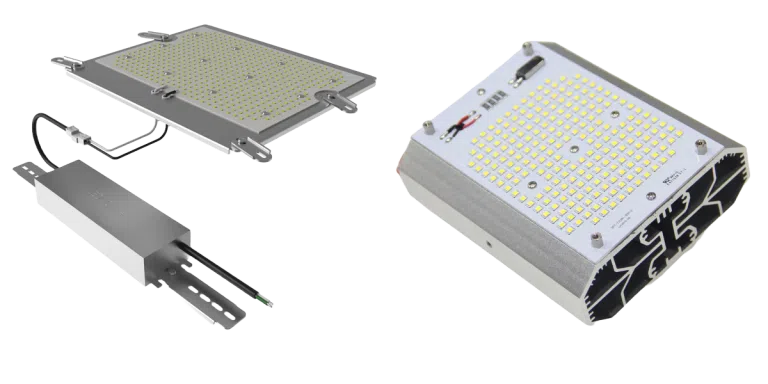
Our Metal Halide to LED Conversion Kits include LED light engines, drivers, and mounting hardware for existing HID fixtures. Available models include standard and shoebox-specific retrofit kits in 45W to 240W configurations, with outputs from 7,425 to 39,600 lumens. Select products include 100-277V input and 16-inch or 23-inch shoebox retrofit configurations.
These retrofit kits are commonly used in shoebox lights, parking lot fixtures, wall packs, flood lights, indoor cans, uplight fixtures, canopy fixtures, and tennis court fixtures.


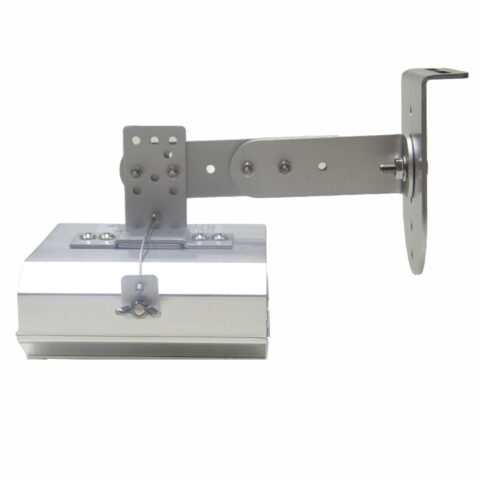
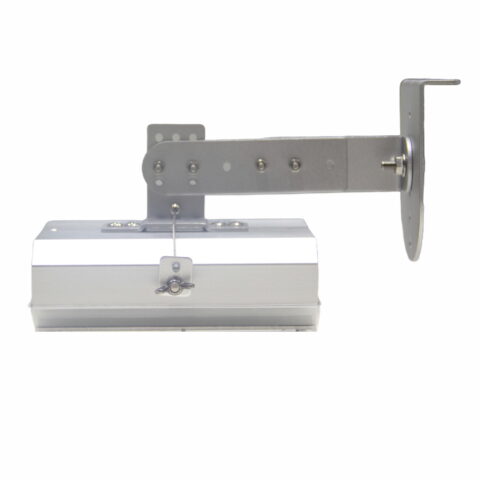
What Is a Metal Halide to LED Retrofit Kit?
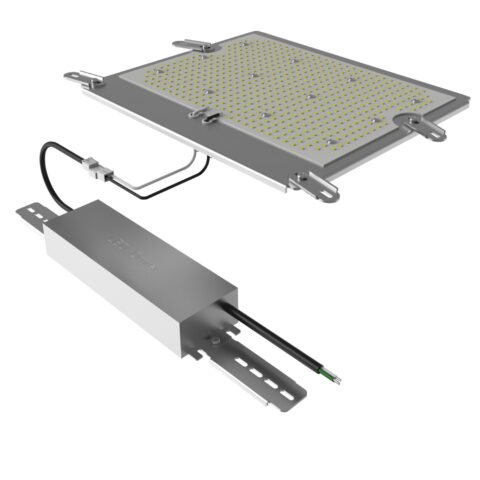
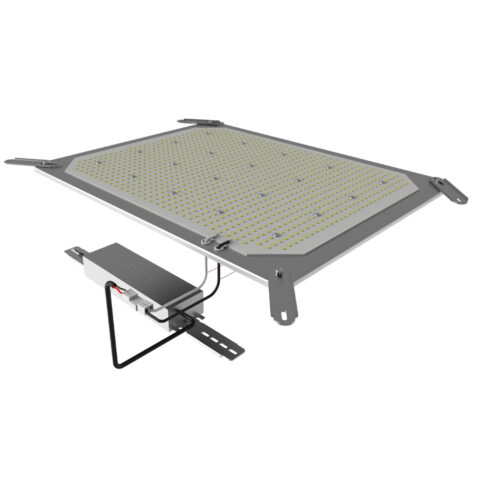
A metal halide to LED retrofit kit upgrades an existing HID fixture by replacing its light source and, depending on the kit and installation method, bypassing or removing the existing ballast. LED retrofit kits typically include an LED light engine, driver, and mounting hardware. They are used when the existing fixture housing is still in good condition, and the goal is to improve efficiency, light quality, startup time, and maintenance without replacing the entire fixture.
Metal halide LED retrofit kits are commonly used in shoebox lights, parking lot fixtures, wall packs, flood lights, indoor cans, uplight fixtures, canopy fixtures, and other HID housings where the enclosure, mounting, voltage, and thermal conditions are compatible with the selected kit. Many kits also replace high-pressure sodium or other HID systems when properly specified.
Unlike metal halide lamps, LED retrofit kits provide instant-on operation and do not require the warm-up or restrike time associated with many HID systems. They can also reduce lamp and ballast maintenance while preserving the existing fixture appearance, which may be useful for architectural, budget-sensitive, or hard-to-replace fixtures.

Selection and Installation Note: Product specifications, wattage, lumen output, voltage, mounting hardware, fixture compatibility, thermal requirements, certifications, controls, and warranty coverage vary by model. Confirm the selected product specification before ordering. Retrofit kits should be installed by a qualified electrician. For code-sensitive, electrical, wet-location, outdoor, hazardous-location, emergency, or safety-critical applications, verify requirements with your local inspector or a licensed electrical professional.
Choose LED Retrofit Kits by Fixture Type, HID Wattage, or Retrofit Goal
First determine whether the existing fixture is a good retrofit candidate: the housing should be in good condition, have adequate internal space, and support compatible mounting, voltage, and thermal conditions. Then match the kit to the fixture type, HID wattage, desired lumen output, and beam pattern. A complete fixture replacement may be the better choice when the project requires a new optic, new fixture body, advanced controls, or a different distribution pattern.
| Retrofit Situation | Best Starting Point |
|---|---|
| 175W to 250W Metal Halide Replacement | Compare lower- and mid-output LED retrofit kits using the existing fixture's photometrics, target light levels, mounting height, and distribution requirements rather than HID wattage alone. |
| 400W Metal Halide Replacement | Use a 100W to 150W LED retrofit kit as an initial product range to evaluate, depending on fixture type, lumen needs, mounting height, and distribution requirements. Confirm the final selection with fixture-specific photometric analysis where performance matters. |
| 1000W Metal Halide Replacement | Use a high-output LED retrofit kit only when the fixture housing, internal space, mounting hardware, voltage, and thermal conditions support the selected kit. Confirm illuminance, uniformity, and glare with fixture-specific photometric analysis for high-output applications; lower-output retrofit kits are not universal replacements for 1000W metal halide fixtures. |
| Shoebox or Parking Lot Fixture Retrofit | Use a shoebox-specific retrofit kit when the existing parking lot fixture housing is structurally sound, and the retrofit kit matches the housing size and mounting method. |
| Architectural Fixture Preservation | Use a retrofit kit when preserving the existing fixture appearance is important and the housing remains safe, clean, sealed, and compatible with LED conversion. |
| Indoor Can or Uplight Retrofit | Use a compatible retrofit kit when the fixture has sufficient internal space, proper ventilation, suitable mounting, and the desired beam pattern. |
| Outdoor or Wet-Location Retrofit | Confirm the existing fixture housing, lens, gasket, seals, and wet-location or IP suitability before installing an LED retrofit kit outdoors. |
| Control-Heavy Upgrade | Consider a full LED fixture replacement if the project requires advanced controls, new optics, integrated sensors, dimming, or a different distribution pattern. |
When LED Retrofit Kits Are the Right Fit
LED retrofit kits are a good fit when the existing fixture housing is still worth keeping and the retrofit kit can be installed safely with proper electrical, thermal, and mounting compatibility. They are not always the best choice when the fixture housing is damaged, corroded, poorly sealed, too small, or optically unsuitable for the application.
| Use LED Retrofit Kits When | Do Not Use LED Retrofit Kits When |
|---|---|
| The existing fixture housing is in good condition and can safely support the retrofit kit, driver, wiring, and mounting hardware. | The fixture housing is damaged, corroded, cracked, poorly sealed, or structurally compromised. A complete fixture replacement is usually safer. |
| The project needs a lower-cost LED upgrade while preserving the existing fixture appearance or mounting location. | The application requires new optics, better distribution, or a different beam pattern that the existing housing cannot provide. |
| The existing fixture has enough internal space for the LED kit, driver, wiring, heat sink, and mounting hardware. | The retrofit kit cannot be installed with proper thermal clearance, driver location, or wiring protection. |
| The voltage and electrical system are compatible with the selected retrofit kit and installation method. | The fixture is in a hazardous location or requires a special certification not provided by the retrofit kit and existing housing combination. |
| The fixture lens, gasket, and enclosure remain suitable for outdoor, wet-location, or dusty environments where applicable. | Advanced controls, sensors, dimming, or integrated features are required and a purpose-built LED fixture would perform better. |
Choosing a Metal Halide LED Retrofit Kit by Wattage, Lumens, Voltage, and Compatibility
Do not select a retrofit kit by HID wattage alone. The correct kit depends on the existing fixture housing, HID wattage, desired lumen output, mounting height, beam distribution, voltage, internal fixture space, thermal performance, and whether the fixture lens or reflector affects final light output.
A retrofit project should confirm the condition of the existing fixture before ordering. If the housing, gasket, lens, reflector, socket, wiring, or mounting hardware is in poor condition, a complete LED fixture replacement may be a better long-term option.
Planning Checklist
| Planning Factor | What to Confirm |
|---|---|
| Existing HID wattage | Confirm whether the fixture currently uses 175W, 250W, 400W, 1000W, or another metal halide or HID lamp before selecting an LED kit. |
| Fixture type | Confirm whether the kit will be installed in a shoebox, wall pack, flood light, canopy fixture, indoor can, uplight fixture, or another HID housing. |
| Housing condition | Inspect the fixture body, lens, gasket, seals, reflector, socket, wiring, and mounting hardware. Do not retrofit damaged or unsafe housings. |
| Internal space | Confirm there is enough room for the LED light engine, driver, heat sink, wiring, and mounting hardware without crowding or overheating. |
| Mounting compatibility | Confirm the retrofit kit physically fits the existing fixture and includes compatible brackets or mounting hardware. |
| Voltage | Confirm site voltage and driver input range before ordering. Many kits support 100-277V, but voltage options vary by model. |
| Lumen output | Compare LED lumen output, fixture condition, mounting height, lens losses, and application needs instead of matching watts directly. |
| Beam distribution | Confirm whether the existing reflector, lens, or housing will produce the desired distribution after retrofit. Some applications need a purpose-built LED fixture. |
| Photometric performance | For parking lots, sports areas, high-mast applications, and other projects where illuminance, uniformity, glare, or distribution matters, use applicable fixture-specific IES data and a photometric plan rather than relying on HID wattage or nominal lumen output. |
| Thermal management | Confirm the retrofit kit can dissipate heat properly inside the existing housing. Poor thermal conditions can shorten LED driver or module life. |
| Outdoor or wet-location rating | For outdoor applications, confirm the existing housing, lens, gasket, and seals remain suitable for the required wet-location exposure. An IP rating addresses enclosure ingress protection and does not by itself establish corrosion or chemical resistance. |
| Controls and dimming | Confirm whether dimming, sensors, timers, photocells, or control systems are needed. A complete fixture replacement may be better for advanced controls. |
| Code and certification requirements | Confirm applicable electrical safety certification, utility rebate requirements, local code, and hazardous-location requirements before ordering or installing retrofit kits. DLC qualification is a performance program, not an electrical safety certification. |
Recommended Metal Halide LED Retrofit Starting Points
The table below provides product starting points for evaluating common metal halide retrofit applications. Final selection should be based on fixture compatibility, desired lumen output, mounting height, beam distribution, environmental conditions, and product specifications. For parking lot, high-output, and other performance-critical applications, confirm expected illuminance, uniformity, and glare through fixture-specific photometric analysis before selecting a retrofit kit.
| Existing HID Fixture | LED Retrofit Starting Point |
|---|---|
| Lower-Output Metal Halide Fixture | 45 Watt LED Retrofit Kit producing 7,425 lumens for compatible lower-output HID fixtures where photometric review confirms adequate light levels. |
| 400W Metal Halide - General Fixture | 100 Watt LED Retrofit Kit producing 15,500 lumens or 120 Watt LED Retrofit Kit producing 18,600 lumens, depending on application, fixture compatibility, and required maintained illuminance. |
| 400W Metal Halide - Shoebox Fixture | 150 Watt 16" Shoebox Retrofit Kit producing 24,750 lumens for compatible parking lot fixtures when the resulting photometric performance meets site requirements. |
| High-Output Shoebox Fixture Retrofit | 240 Watt 23" Shoebox Retrofit Kit producing 39,600 lumens for compatible high-output parking lot fixtures. This output is not a universal replacement level for a 1000W metal halide fixture. Verify fixture fit, thermal conditions, target illuminance, uniformity, glare, and fixture-specific photometric results for the existing housing and site layout. |
These are not universal replacements. A 400W or 1000W metal halide fixture may require a different LED solution depending on fixture type, optics, pole height, application, target light level, uniformity, glare, and existing fixture condition.

LED Retrofit Kit vs Complete LED Fixture Replacement
Both approaches can modernize an HID lighting system. After fixture compatibility has been confirmed, compare the installation scope, future maintenance approach, and level of fixture-level optical and environmental performance needed for the project.
| Project Consideration | Retrofit Kit and Complete Fixture Comparison |
|---|---|
| Existing appearance and mounting location | A retrofit retains the existing fixture body and exterior appearance. A complete replacement changes the fixture body and may require a new mounting adapter, arm, or other site modifications. |
| Installation scope | A retrofit generally requires opening the existing fixture, installing the LED components, and completing the required wiring changes. A complete replacement removes the existing fixture and installs a new luminaire and mounting arrangement as needed. |
| Optical performance documentation | A purpose-built LED fixture is typically tested and documented as a complete luminaire. Retrofit performance depends on the selected kit and the existing housing, reflector, lens, and installation configuration. |
| Future service | Retrofits retain the legacy housing, lens, seals, and mounting components for future inspection and maintenance. A new fixture renews those components, while driver and module serviceability varies by fixture model. |
| Controls and integrated features | Retrofit controls must be compatible with the kit and existing installation. New fixtures may offer factory-integrated sensors, photocells, dimming, and control options on compatible models. |
| Project planning | Either option should be selected using product specifications and fixture-specific photometric information where light levels, uniformity, glare, or distribution are important. |
Metal Halide Retrofit Project Examples
Retrofit projects are most successful when the existing fixture is evaluated before ordering. Housing condition, internal space, mounting compatibility, voltage, and desired output all affect the final result.

Metal halide LED retrofit kits can upgrade existing HID housings when the fixture is in good condition and the kit is compatible.

Shoebox retrofit kits can be a practical option for compatible parking lot fixtures where the existing housing and mounting remain suitable.
Certifications, Rebates, and Warranty Support
Selected metal halide LED retrofit kits from LED Lighting Supply carry safety listings from Nationally Recognized Testing Laboratories, such as UL or ETL, depending on the product. Selected kits are DLC or DLC Premium listed, supporting utility rebate eligibility where applicable. Rebate requirements vary by utility, region, and product listing, so confirm eligibility on the selected product specification before ordering.
Warranty terms vary by model, with many retrofit kits offering a 5-year warranty unless otherwise specified. Before purchase, confirm certifications, DLC status, voltage, surge protection, driver location, thermal conditions, fixture compatibility, environmental exposure, controls compatibility, and warranty terms for the selected product.
Common Metal Halide LED Retrofit Installation Mistakes
After the correct retrofit kit has been selected, installation quality affects safety, reliability, and final performance. Follow the retrofit kit manufacturer’s instructions and have a qualified electrician complete wiring and final testing.
- Leaving the ballast connected when the kit requires ballast bypass: Follow the kit wiring diagram exactly. Disconnect, remove, or isolate ballast components as instructed; do not assume a retrofit kit operates with the existing ballast.
- Failing to de-energize and verify the circuit: HID fixtures may have multiple supply conductors or control wiring. Qualified installers should follow applicable electrical safe-work practices before opening or modifying the fixture.
- Using unsuitable splices or unsecured conductors: Use listed wiring connectors and route conductors so they are protected from sharp edges, pinch points, moving parts, and contact with hot components.
- Omitting equipment grounding: Maintain the fixture and retrofit kit grounding connection as required by the manufacturer instructions and applicable electrical code.
- Installing the driver where it cannot be serviced or cooled as instructed: Secure the driver in the approved location, maintain required clearances, and do not block heat-dissipation surfaces or fixture drainage paths.
- Damaging or misaligning the LED light engine during installation: Secure brackets, modules, and optics using the supplied hardware and specified fasteners so vibration or wind does not loosen components.
- Failing to restore the enclosure seal: Reinstall lenses, gaskets, covers, and fasteners correctly after wiring. A retrofit does not preserve wet-location performance if the enclosure is not resealed properly.
- Skipping aiming and nighttime verification: For parking lots, sports areas, floods, and other directional applications, verify aiming, light distribution, glare, and operation after installation.
- Not labeling or documenting the modification: Retain the kit instructions and installation information for future service, and apply any labels supplied or required by the retrofit kit manufacturer.
Contact us about your metal halide LED retrofit project and our Product Specialists can help review existing fixture type, HID wattage, housing condition, voltage, mounting compatibility, lumen output, and product specifications before you order.
Metal Halide to LED Conversion Kits FAQs
When Is A Metal Halide To LED Retrofit Kit A Good Fit?
A metal halide to LED retrofit kit is a good fit when the existing fixture housing is in good condition, can safely support the kit and hardware, and can provide the required light output and distribution. It can preserve the existing fixture appearance and mounting location while upgrading the HID fixture.
When Should I Replace The Entire Fixture Instead Of Retrofitting It?
A complete LED fixture replacement may be better when the existing housing is damaged, corroded, poorly sealed, too small, structurally questionable, or optically unsuitable. Replacement may also be the better option when the project requires new optics, advanced controls, integrated sensors, new mounting, or a different distribution pattern.
How Should I Choose The Right LED Retrofit Kit?
Select an LED retrofit kit based on the existing fixture type and condition, HID wattage, desired lumen output, mounting height, beam distribution, voltage, internal space, thermal performance, and fixture lens or reflector. Do not select a kit by HID wattage alone.
What Should Be Checked Before Ordering A Retrofit Kit?
Before ordering, confirm housing condition, internal space, mounting compatibility, site voltage, lumen output, beam distribution, thermal management, environmental exposure, controls compatibility, certifications, and warranty terms. The selected product specification should also be confirmed because wattage, lumen output, voltage, mounting hardware, certifications, controls, and warranty coverage vary by model.
Can A Metal Halide Retrofit Kit Be Used Outdoors?
A metal halide retrofit kit can be used outdoors only when the existing housing, lens, gasket, and seals maintain the required wet-location or IP rating after retrofit. Confirm the selected kit and existing fixture housing are suitable for the outdoor environment.
What Are The Starting Points For Replacing A 400W Metal Halide Fixture?
For a general 400W metal halide fixture, 100W and 120W LED retrofit kits are listed starting points, depending on application and fixture compatibility. A compatible 400W metal halide shoebox fixture may use a 150W 16-inch shoebox retrofit kit producing 24,750 lumens.
Do Metal Halide To LED Retrofit Kits Require Electrical Changes?
Retrofit kits often require electrical changes, including ballast bypass or wiring requirements. Retrofit kits should be installed by a qualified electrician.
How Can I Confirm Rebate Eligibility And Warranty Coverage?
Many metal halide LED retrofit kits are DLC or DLC Premium listed, supporting utility rebate eligibility where applicable, but requirements vary by utility, region, and product listing. Most kits include a 5-year warranty unless otherwise specified, and rebate eligibility and warranty terms should be confirmed on the selected product specification before ordering.