Buyers Guide to Composite Fiberglass Poles
Light and utility poles face extreme weather conditions, mechanical stress,...
Learn More →Get expert guidance from our Product Specialists who match the right solutions to your project's requirements.

Street and parking lot lights deliver powerful illumination across extensive outdoor areas where safety and visibility are critical. Light poles serve as mounting platforms for fixtures that brighten highways, commercial parking areas, residential streets, and pedestrian pathways. Most installations feature 1 to 4 fixtures positioned at or near the pole top, casting light downward to maximize ground coverage and minimize light pollution. Important: Light pole installation involves structural and electrical work that can pose safety risks. This guide provides general information only. Always consult with licensed structural engineers and certified electricians for your specific project requirements and local code compliance.
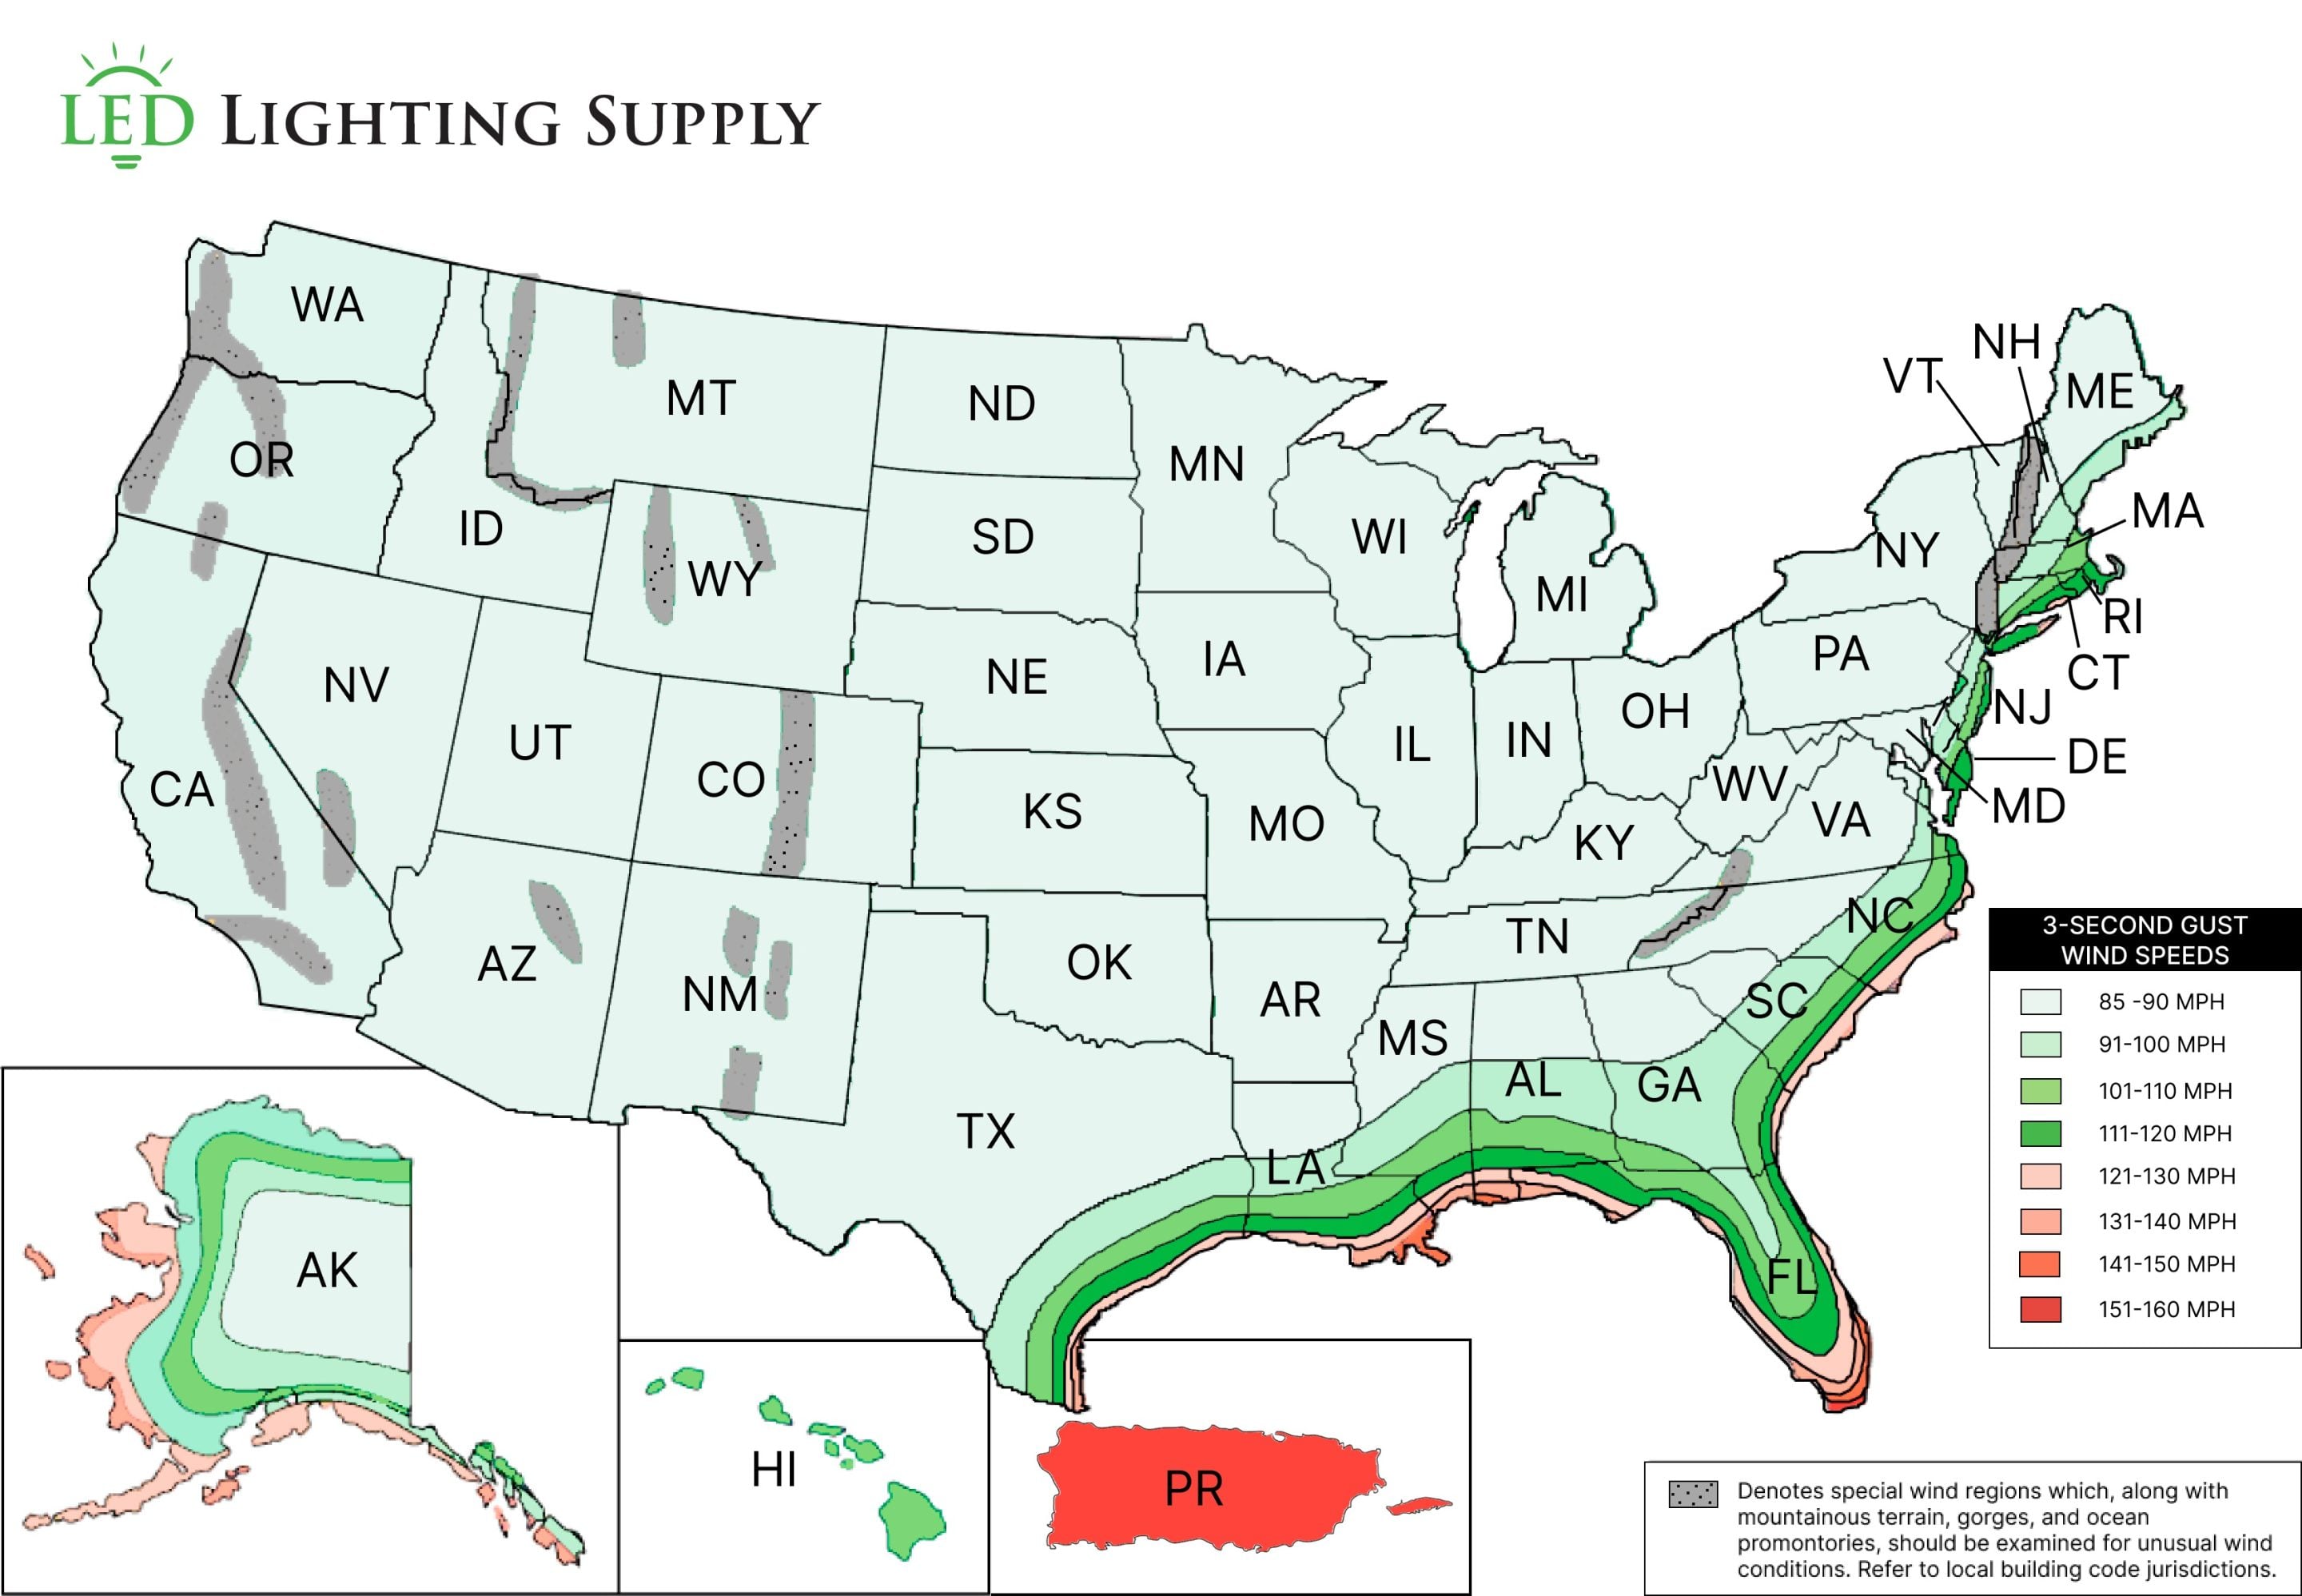
Light poles are constructed from steel, aluminum, or fiberglass, with wood and concrete alternatives offering cost-effective solutions for specific applications. Round and square profiles accommodate different aesthetic and structural requirements. Installation success depends on location conditions, intended use, pole specifications, and local building codes. Understanding your area’s EPA wind rating helps prevent dangerous failures. Review local wind load requirements to ensure proper foundation design.
Professional site evaluation should include soil analysis, drainage assessment, utility location, and accessibility planning. These factors directly impact installation method selection and long-term performance.
Two primary installation methods accommodate different site conditions and performance requirements:
Direct burial involves placing the pole shaft directly into an excavated hole. Aluminum or fiberglass poles are commonly used for this method due to their corrosion resistance. The excavation can be backfilled with compacted soil or concrete, depending on engineering requirements. Soil considerations:
Anchor-based systems secure poles to concrete foundations using base plates and anchor bolts. This approach offers superior maintenance access and replacement capabilities.  Key advantages:
Note: The following are general guidelines only. Actual specifications must be determined by qualified engineers based on site conditions, pole specifications, and local requirements.
Typical excavation guidelines:
Installation steps:
Concrete burial follows similar excavation and positioning steps, using concrete mix instead of backfill material for permanent, high-strength foundations. Allow proper curing time as specified by engineering requirements before energizing the installation.
Most anchor installations require engineered concrete foundations sized for stability and load distribution. Foundation dimensions must correspond to pole specifications and local wind load calculations.  General installation sequence:
Helical anchor systems use large-diameter steel plates that penetrate stable soil layers, eliminating concrete requirements in suitable conditions. Installation requires hydraulic rotary equipment and qualified operators. 
Light pole installation requires precision and adherence to safety standards. Poor alignment during installation creates safety hazards and performance issues. Misaligned anchor bolts can make pole mounting impossible without costly corrections. Strong technician management with clear task assignments, checklists, and accountability helps prevent alignment mistakes and keeps the installation compliant and safe. We strongly recommend:
LED Lighting Supply’s product specialists provide guidance throughout your pole selection process, helping ensure compatibility between fixtures, mounting hardware, and environmental conditions. Our team can assist with energy calculations and custom lighting plans tailored to your facility’s requirements. With extensive commercial lighting experience, our specialists understand the relationship between pole specifications, wind load ratings, and fixture performance across applications from parking lots to street lighting systems. Contact our team to discuss your specific lighting project requirements. Disclaimer: This information is provided for general guidance only. LED Lighting Supply recommends professional consultation for all structural and electrical work. Local codes, soil conditions, and site-specific factors require a qualified professional assessment for safe and compliant installations.

Cory Peterson is Vice President of Marketing & Sales Operations at LED Lighting Supply where he focuses on improving customer experience and revenue operations. Cory writes about commercial & industrial lighting, along with topics important to contractors and facility managers. In his free time, Cory enjoys traveling, snorkeling, exercise and cooking.